Home
|
Message Board
|
Information
|
Classifieds
|
Features
|
Video
|
Boat Reviews
|
Boat DIY
Walleye Central
Muskie Central
Ranger Boats
Cabelas
General Discussion
Boats
Electronics
Motors and Props
Vendor Classifieds
Boat Insurance
Boat Financing
Muskie Board
Strictly Fishing
Ice Fishing
Swap Board
Share A Seat
Canada Eh?
Trailers and Tow Vehicles
Fishing Reports
Tournament Board
Lobby
Big Game
Hunting Discussion
Small Game and Birds
Hunting Dogs
Archery, Blackpowder, Rifles, Etc.
Chatsite
Chat Schedule
Home Grown Tackle
Pro Pages
Articles and Tips
Tournament News
Events Calendar
FAQ's
Search all Ads
Submit an Ad
Edit Existing Ad
Guides & Lodging
Vendor Classifieds
Business Directory
Pro Pages
Share A Seat
Ten Pound Club
Member Photos
Video Home
Upload Video
My Videos
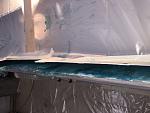
Walleye Message Central - 2Rod's Album: Transom Rebuild
Walleye Message Central
>
All Albums
>
2Rod's Profile
>
Albums
Transom Rebuild
User Name
Remember Me?
Password
Register
All Albums
FAQ
Members List
Calendar
Search
Today's Posts
Mark Forums Read
Page 1 of 2
1
2
>
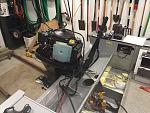
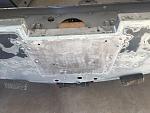
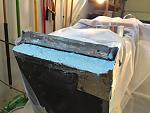
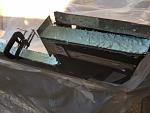
Transom Rebuild
Page 1 of 2
1
2
>
All times are GMT -6. The time now is
01:23 AM
.
-- Default Style
-- vB37 Original
Contact Us
-
Walleye Central
-
Archive
-
Top
Powered by vBulletin® Version 3.8.8
Copyright ©2000 - 2024, vBulletin Solutions, Inc.
vBulletin Security provided by
vBSecurity v2.2.2 (Pro)
-
vBulletin Mods & Addons
Copyright © 2024 DragonByte Technologies Ltd.
Terms of Use
Copyright
Privacy Policy
Your Privacy Choices
Manage Consent


 Your Privacy Choices